How To Fix Windows Printer Error 0x000000520
In this article, we tried to resolve the error code 0x000000520 that Windows users encountered while connecting to the printer.
Windows users encounter the error code 0x000000520 while connecting to the printer, along with the error "Windows cannot connect to the printer", preventing users from connecting to the machine. If you are facing such a problem, you can find the solution by following the steps below.
What is Windows Printer Error 0x000000520?
We are encountering such an error due to a problem with the new update package of Windows. The network security included in this package brings such a problem to us when a connection is made to the printer in the network. In other words, it appears to be an error that occurs with the network security plugin of Windows developers, not a user error. To solve this, you can reach the solution of the problem by performing the following procedure.
How To Fix Windows Printer Error 0x000000520
We will tell you a few suggestions to solve this error.
1-) Uninstall Windows Update
To get rid of this error, we first need to uninstall the Security Update for Microsoft Windows (KB5006674). For this;
- Open it by typing "Control Panel" in the Start search bar.
- Click on the Uninstall a program option on the Programs tab.
- Click on the "View installed updates" option on the left.
- Right click on Security Update for Microsoft Windows (KB5006674) and click uninstall and uninstall the update.
After this process, restart the computer and check if the problem persists.
2-) Turn On Printer Protection
We can completely fix this problem by activating the printer protection in the registry. For this;
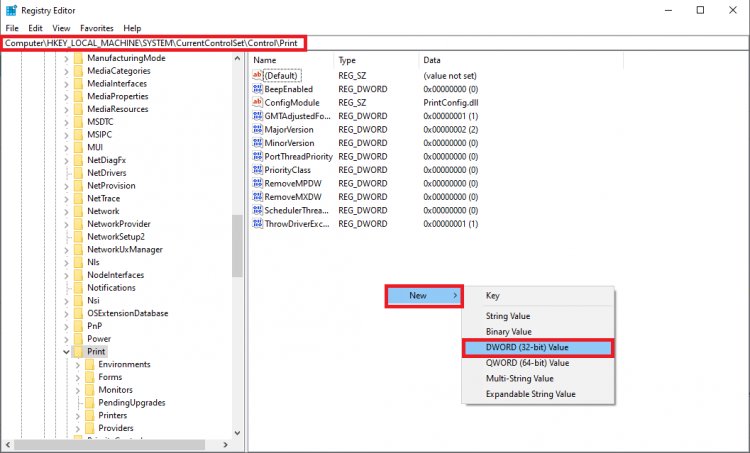
- Open the start search screen by typing regedit.
- Type Computer\HKEY_LOCAL_MACHINE\SYSTEM\CurrentControlSet\Control\Print in the search box above and press enter. If it can't find the path, find it manually.
- We create a new registry by right-clicking on the screen that opens on the right and selecting New>DWORD (32-bit) Value.
- Change the registry name we just created to RpcAuthnLevelPrivacyEnabled and double-click on it.
- On the screen that opens, set the Value data to 0 and press the OK button.
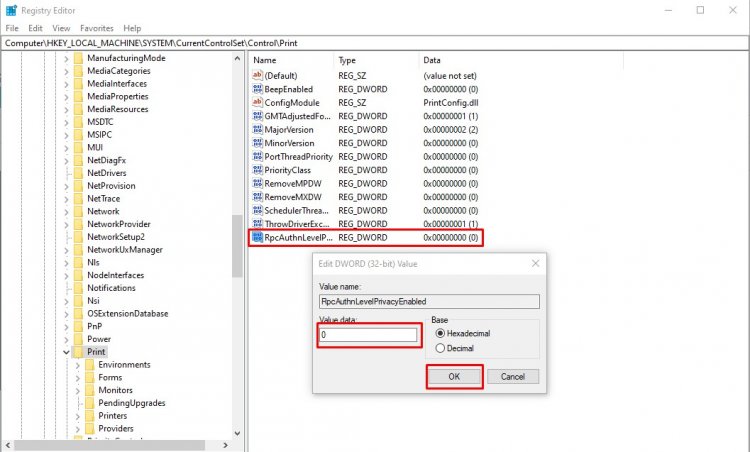
After performing the settings, you will completely get rid of this error by restarting your computer.
3-) Enable Signature Requirement
If driver signature enforcement is disabled, the firmware to be signed cannot be run and we will encounter an error code. In order to prevent this error, we can activate the driver signature enforcement by typing code on the command prompt screen. For this;
- Type cmd on the start search screen and run it as an administrator.
- Type the following code snippet on the command prompt screen that opens and press enter.
- bcdedit /set nointegritychecks off
After the process is successfully applied, restart the computer and check if the problem persists.